Playground
Introduction
The combination of Jupyter notebooks, the pyhubio library and the AXI4 hub allows interactive communication with all parts of the FPGA configuration and visualization of input and output data, making testing and prototyping more dynamic.
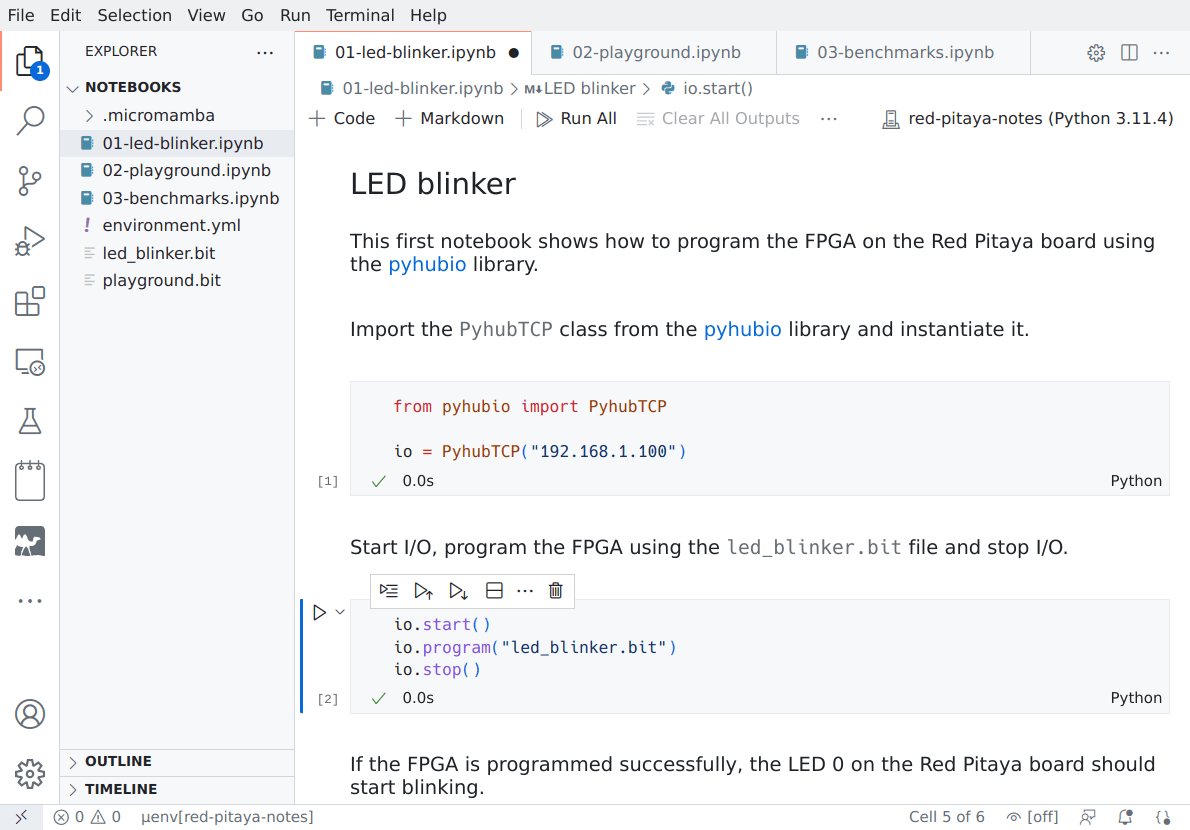
The notebooks directory contains a few examples of Jupyter notebooks.

Hardware
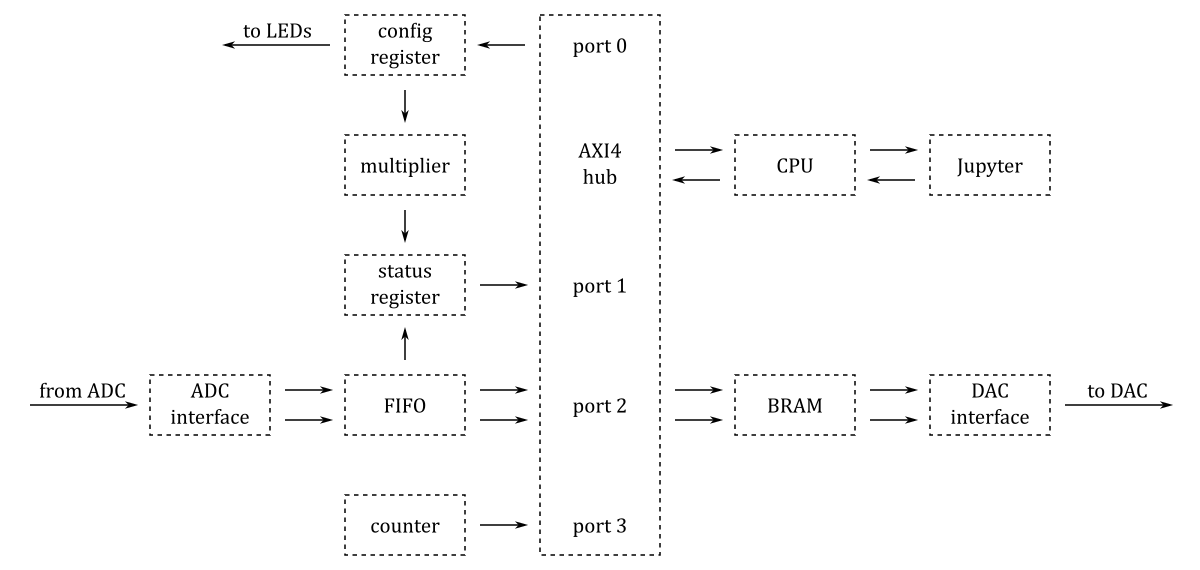
The basic blocks of the playground project are shown in the following diagram:

The projects/playground directory contains one Tcl file block_design.tcl that instantiates, configures and interconnects all the needed IP cores.
A pre-built Vivado project can be found in the playground directory in the release zip file.
Getting started
Download SD card image zip file (more details about the SD card image can be found at this link)
Copy the contents of the SD card image zip file to a micro SD card
Optionally, to start the application automatically at boot time, copy its
start.shfile fromapps/playgroundto the topmost directory on the SD cardInstall the micro SD card in the Red Pitaya board and connect the power
Download and unpack the release zip file
Install Visual Studio Code following the platform-specific instructions below:
Install the following Visual Studio Code extensions:
Open notebooks directory in Visual Studio Code:
- From the "File" menu select "Open Folder"
- In the "Open Folder" dialog find and select notebooks directory and click "Open"
Create micromamba environment:
- From the "View" menu select "Command Palette"
- Type "micromamba create environment"
Working with notebooks
Open one of the notebooks in Visual Studio Code
Make sure the micromamba environment called "red-pitaya-notes" is selected in the kernel/environment selector in the top right corner of the notebook view
Run the code cells one by one by clicking the play icon in the top left corner of each cell