Wideband SDR transceiver
Introduction
This version of the Red Pitaya SDR transceiver may be useful for wideband applications.
Hardware
The structure of this version is very similar to the SDR transceiver described at this link. The two main differences are:
- only one RX and one TX channel,
- higher sample rates (up to 2500 kSPS).
The basic blocks of the digital down-converter (DDC) and of the digital up-converter (DUC) are shown in the following diagram:

The projects/sdr_transceiver_wide directory contains four Tcl files: block_design.tcl, trx.tcl, rx.tcl, tx.tcl. The code in these files instantiates, configures and interconnects all the needed IP cores.
Software
The projects/sdr_transceiver_wide/server directory contains the source code of the TCP server (sdr-transceiver-wide.c) that receives control commands and transmits/receives the I/Q data streams (up to 2 x 32 bit x 2500 kSPS = 152 Mbit/s) to/from the SDR programs.
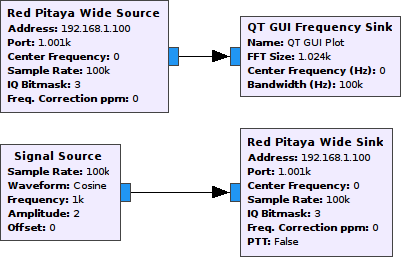
The projects/sdr_transceiver_wide/gnuradio directory contains GNU Radio blocks and a few flow graph configurations for GNU Radio Companion.
The projects/sdr_transceiver_wide/gnuradio directory contains GNU Radio blocks and an example flow graph configuration for GNU Radio Companion.
Transmitting and receiving complex baseband signals
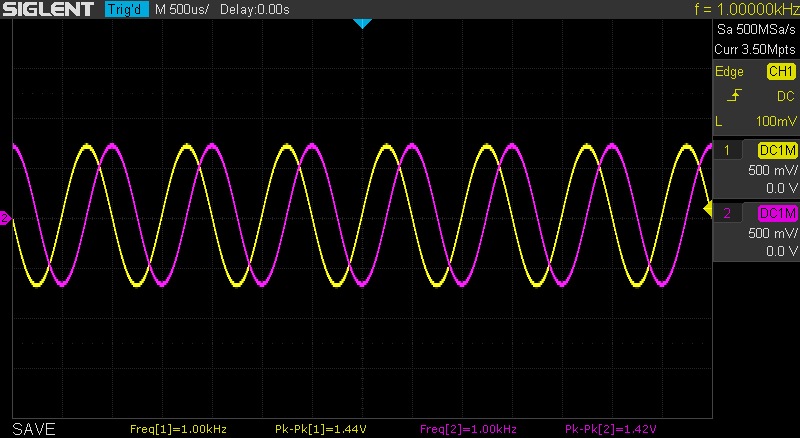
To transmit and to receive complex baseband signals via two outputs (OUT1 and OUT2) and two inputs (IN1 and IN2), the central frequency should be set to 0 and the IQ bitmask should be set to 3.

Here is a picture of a complex 1 kHz cosine waveform as seen by an oscilloscope connected to OUT1 and OUT2:

Getting started
- Connect an antenna to the IN1 connector on the Red Pitaya board.
- Download SD card image zip file (more details about the SD card image can be found at this link).
- Copy the contents of the SD card image zip file to a micro SD card.
- Optionally, to start the application automatically at boot time, copy its
start.shfile fromapps/sdr_transceiver_wideto the topmost directory on the SD card. - Install the micro SD card in the Red Pitaya board and connect the power.
- Install GNU Radio:
sudo apt-get install gnuradio- Clone the source code repository:
git clone https://github.com/pavel-demin/red-pitaya-notes- Run GNU Radio Companion and open an example flow graph:
cd red-pitaya-notes/projects/sdr_transceiver_wide/gnuradio
export GRC_BLOCKS_PATH=.
gnuradio-companion trx_wide_template.grc
Building from source
The installation of the development machine is described at this link.
The structure of the source code and of the development chain is described at this link.
Setting up the Vitis and Vivado environment:
source /opt/Xilinx/2025.2/Vitis/settings64.shCloning the source code repository:
git clone https://github.com/pavel-demin/red-pitaya-notes
cd red-pitaya-notes
Building sdr_transceiver_wide.bit:
make NAME=sdr_transceiver_wide bitBuilding SD card image zip file:
source helpers/build-all.sh